Create a Company Group for Shared Emails, Calendars, Resources
You may need to able to easily collaborate and have a shared Calendar to add all the requests for Vacations so everyone can see or a single email address you can send to, to alert everyone in that group of some event going on, and best way to do that is to create a Group in Microsoft Outlook...
Just sharing a calendar can be great until that person leaves... but with Groups, you can still have the flexibility for anyone to create shared resources but still able to assign multiple owners and the admin can easily go in and reassign or assign multiple owners to a group, so if someone does leave, there are many options to have it continue on.
Most users can start and become the default owners of a group by simply following these steps...
Members can see and edit all events, if you want more control over it, you may opt with Shared Mailbox option and sharing calendar, however there are more steps involved in creating and then adding/removing users that can see it.
Create a Group in Outlook Desktop - Classic
1. Under Home Ribbon, look for Groups and New Group

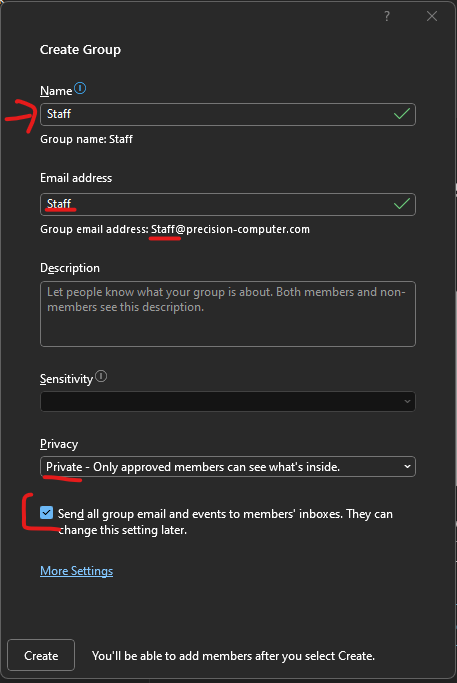
2. Create a group name, and select the options below (it will try to auto choose an email, I would recommend to have Privacy enabled to only allow approved members that you have added)
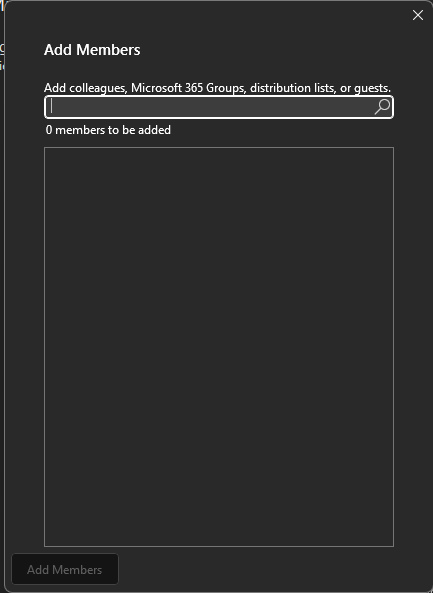
3. Add your members by simply starting to type name or email address and clicking on them
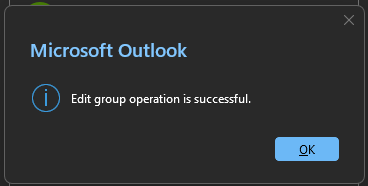
4. Click Add Members and you will get message stating that it was successful
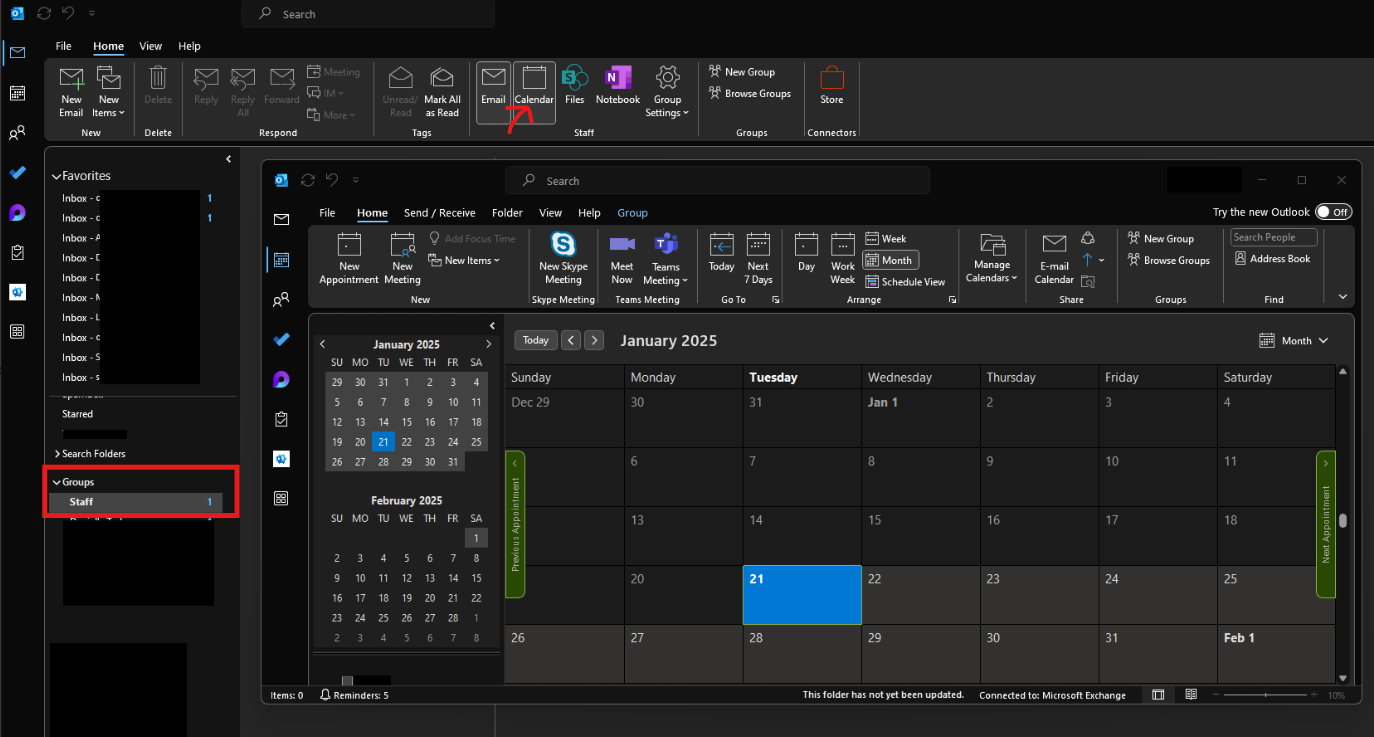
5. You will see the group Created and you may open the Email or Calendar Resources to see it
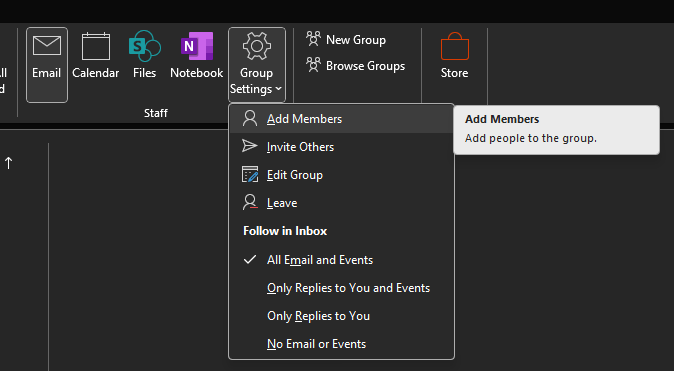
You may click Group Settings to Add more Members, Edit Group or Leave the Group, Also set how you want to follow the group.
Make sure everyone goes into their Calendar on Outlook Web, Desktop, or Mobile App, and into Calendar, then under Groups, checkmarks the Group Calendar so it would be visible to them.
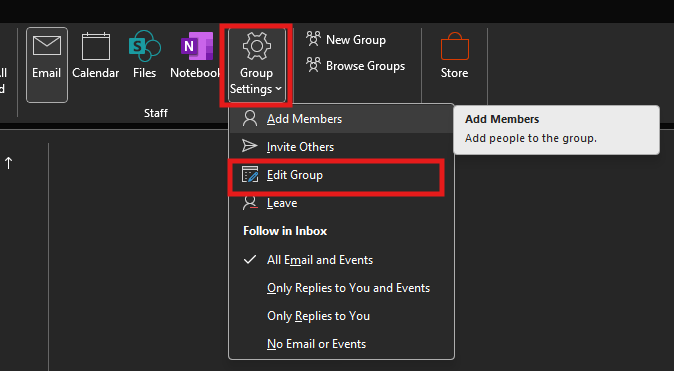
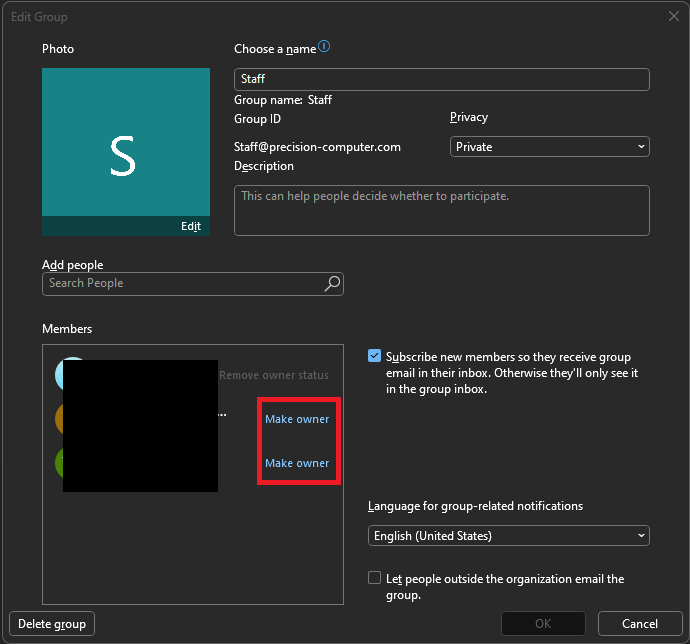
Adding more Owners
- Go to the Group and then select Group Settings
- Select Edit Group

- Under Members, click Make owner to as many Members as you would like (you do need to add them as members first, if they don't appear in the list)

No Comments